All work carried out by ukbathroomguru.com.
Introduction
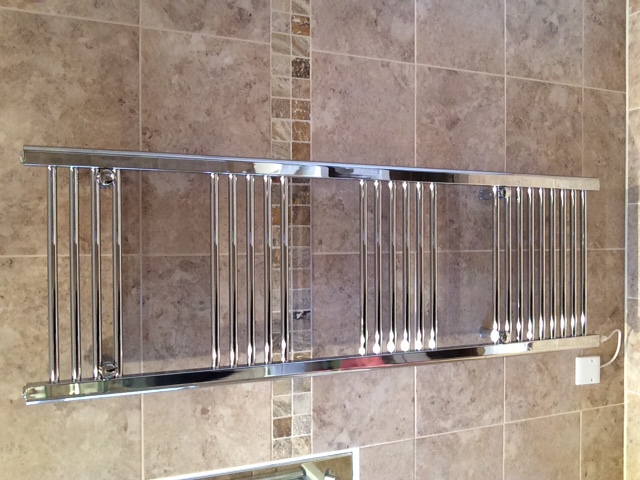
Large towel radiators are often very heavy and need fixing to plaster-boarded stud walls in an adequate manner.
If someone were to trip and grab onto the radiator for support, you don’t want them pulling it off the wall!
Approaches to attaching heavy objects to stud walls
There are 3 ways of doing this in my opinion (in order of preference – the first being the ideal scenario).
- Strip the plasterboard back to the studs and add supporting noggins to go behind the various fixing points where the towel radiator is to be supported (ie where the brackets screw into the wall) as can be seen in this case study.
- Reinforce where the brackets will go to take a screw fixing (the focus of this case study) that will be much stronger than….
- Use a fixing such as a spring toggle fixing, hollow wall anchor or self drive plug which each have their own problems in tiled walls in particular.
Securely fitting a radiator to a stud wall
Firstly the radiator is assembled and all fixing brackets are attached to it as required.
Prior to tiling (or plastering) the position of the radiator is determined ie where it will be attached to the wall.
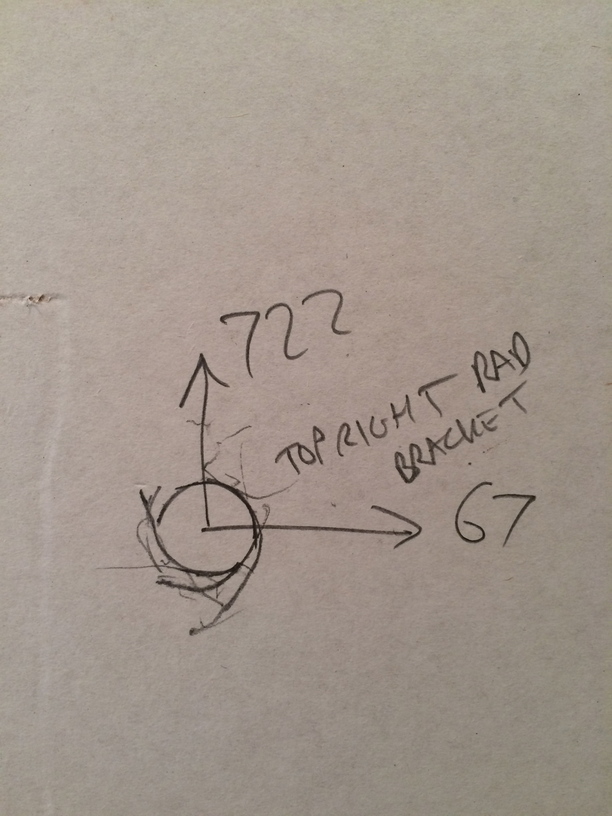
The 4 x brackets that attach the radiator to the wall are drawn around once the radiator has been held level in the exact position in which it will be installed at 2nd fix.
PS This takes 2 people: one to hold and one to mark.
The bracket’s exact position is recorded so that it can be placed in exactly the same position at 2nd fix (after tiling when the pencil marks can no longer be seen)
This part is very important!

A square of plasterboard is removed with a Fein (or plasterboard saw)
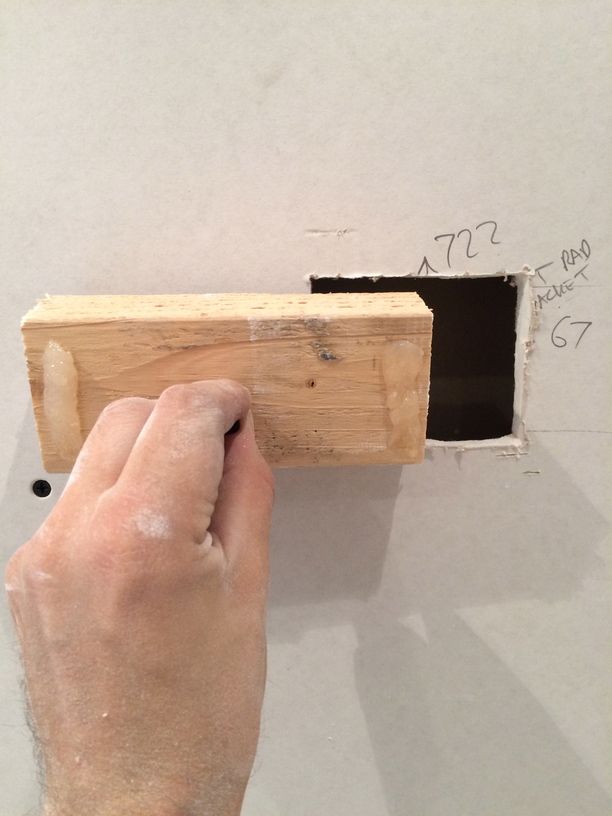
A piece of 3×2 timber studwork is cut to length and glue applied to the extremeties of its front face.
A temporary screw in the centre of the piece of timber helps keep hold of it when manouvering it into the hole.
This timber is then screwed to the back side of the plasterboard using 4 drywall screws.
PS The glue added to the face of the timber will also bond with the back of the plasterboard to make it even stronger)
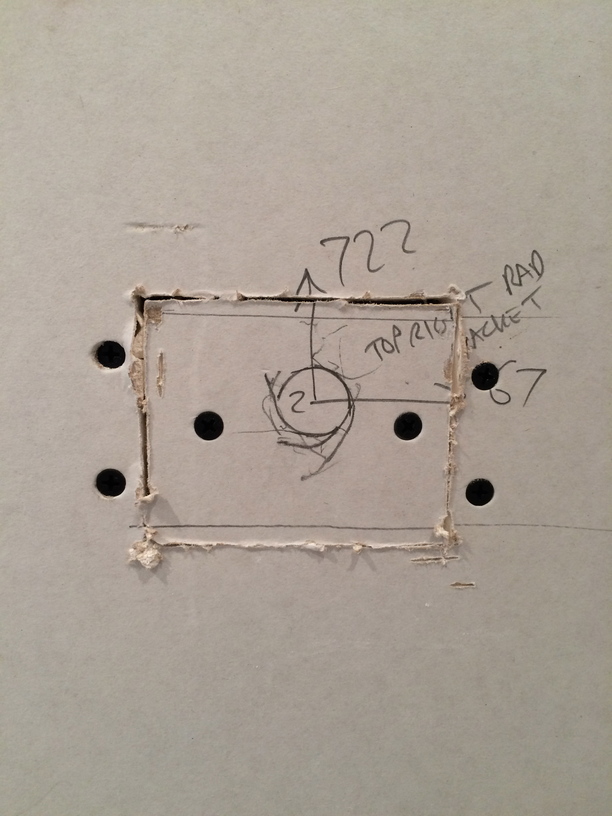
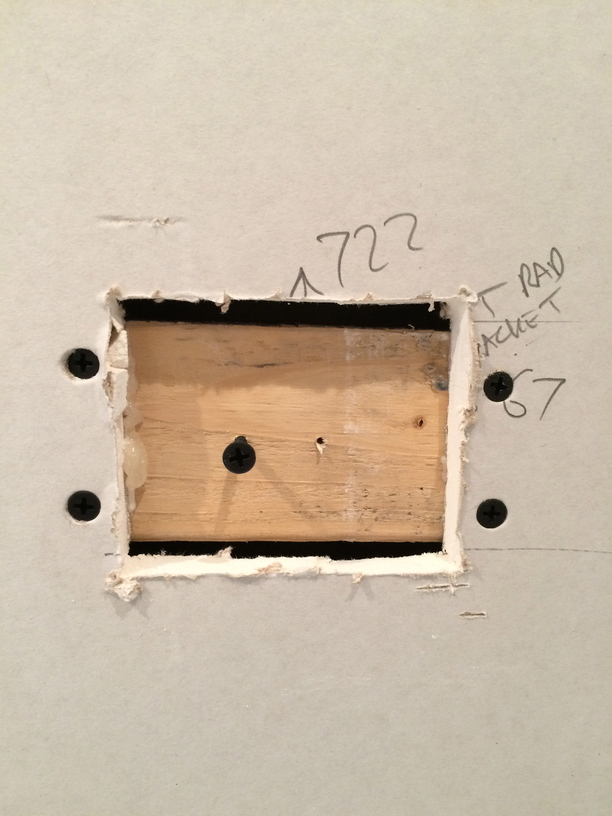
The original piece of plasterboard is then put back into position and screwed into place.
Note that the screw positions avoid the bracket position – this will ensure that they do not clash with the single screw that fixes the bracket into place (which is centred in the circle)
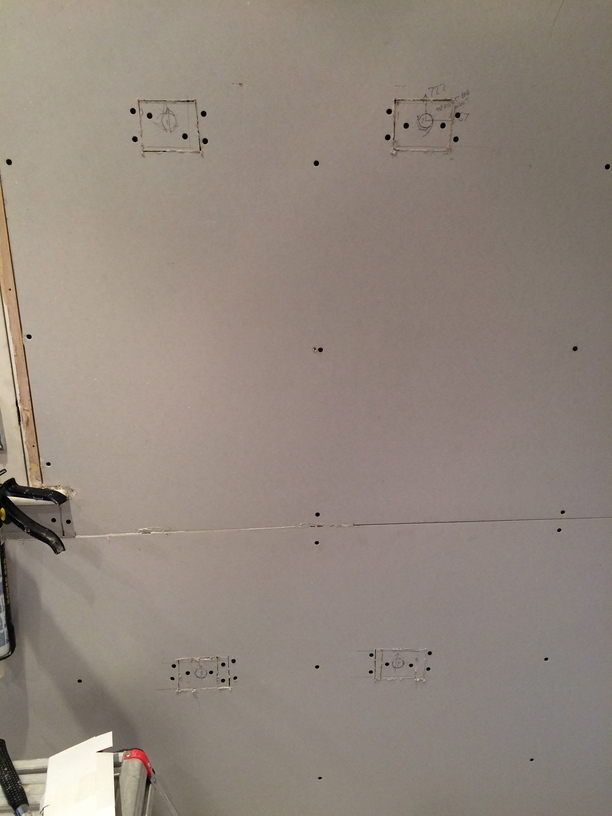
This process is then repeated for the other 3 bracket positions…
The wall can then be tiled or plastered as long as all the exact bracket locations have been recorded in a suitable manner…..
After tiling, the radiator brackets are screwed directly into the timber supports in the wall without the need for wall plugs though of course a small hole has to be drilled into the tile to allow the screw to pass through it.
Summary
This approach allows for a much stronger fixing than any wall plug in my opinion, and can be used to fix many heavy items, not just radiators.
I hope you have found this useful, please leave a comment below if you have any other tips…
Chris
What We Do
We install quality bathrooms from start to finish, with all the bits in between taken care of.
We provide advice and guidance during a free site survey, and we have a blog with lots of articles that cover frequently asked questions and show you examples of our recent work.
We install bathrooms from start to finish, supplying all the necessary trades and project managing the whole process, so you don’t have to! We normally supply & fit bathroom suites but in this example we fitted a customer supplied suite.
We work to detailed, itemised estimates with fixed costs, so you can budget properly without fear of unexpected skyrocketing prices.
Our focus is on doing a proper job for a fair price in a reasonable time – see here for more info or contact me for a quote.