This article shows how ukbathroomguru enlarged an en suite & knocked through into an adjacent bedroom to make a jack ‘n’ jill bathroom to serve both bedrooms on the top floor of this house.
Introduction
Sometimes you don’t need to add an additional en suite to make your house more functional.
Maybe you could amend an existing house bathroom or en suite to make it into a jack ‘n’ jill room?
This means adding an additional door (and maybe rejigging the layout) so that the room can be accessed from either of the two adjoining rooms.
This approach saves money when compared to installing an additional bathroom or en suite, and when planned correctly this approach can be very effective.
Case Study
This case study shows how we designed, planned and then installed a jack ‘n’ jill en suite, with everything taken care of from start to finish:
Existing en suite


The existing en suite was tucked away in the corner of the bedroom and was quite small.
Free site survey to assess feasibility of plans
Guests in the front bedroom previously had to descend the stairs every morning and evening to use the house bathroom (which was itself shared by another two bedrooms).
This was obviously not ideal, so we planned a few layouts that would work with the existing plumbing and drainage which we assessed during our free site survey.


Plan number 3 above was eventually chosen as it maximised space alongside the double bed in the primary bedroom for a bedside table etc.
Free quotation
We then provided a free itemised, written quotation so the customer could see EXACTLY where their money would be going, as it was split down by trade i.e. waste disposal, plumbing, tiling, building, joinery, electrics, plastering, painting etc.
Finally we installed the en suite, which consisted of the following trades that were all supplied and project managed as part of the overall service.
Building work


We knocked through a new doorway into the other bedroom which involved inserting a concrete lintel to support the wall above.
A velux window was installed by a 3rd party contractor.
Joinery work

We built new stud walls to suit the new layout which had the effect of making the space much bigger internally.

We added a small storage area (shown above) behind the en suite that would otherwise have been dead space in the eaves.
We hung doors, and fit skirting boards and architrave as required.
We even straightened out an existing wall which was very wonky!

Plastering
Walls were insulated and boarded prior to plastering:


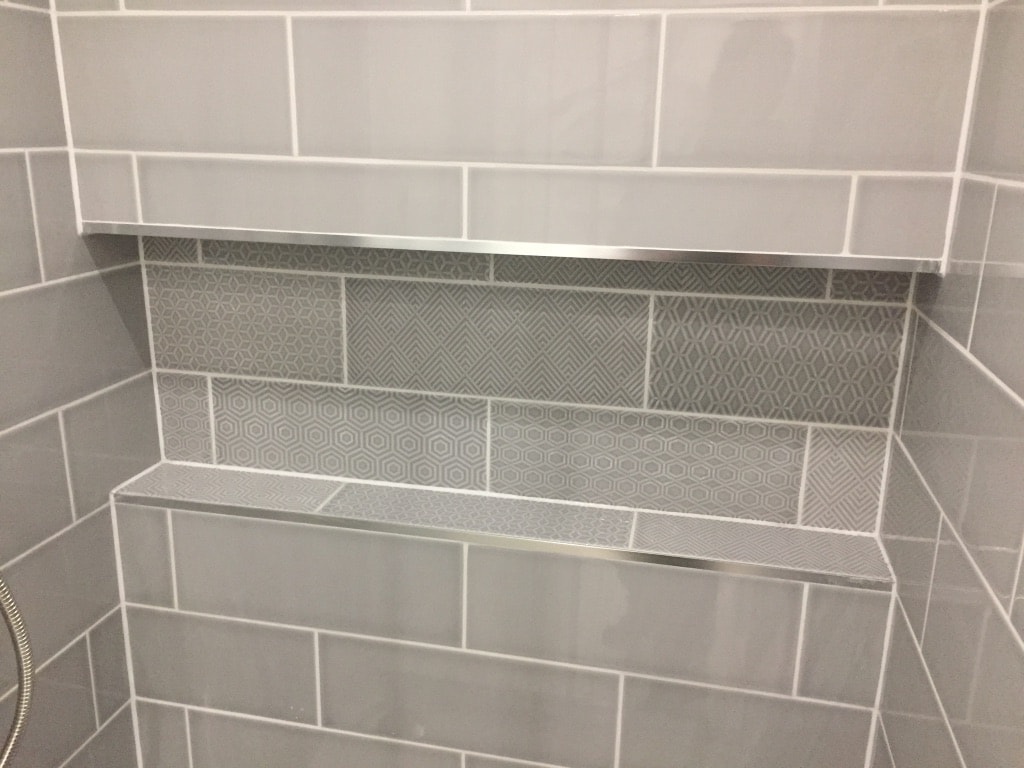
Here you can see the shower area with a simple storage alcove:

(At the same time, we insulated and boarded the rest of the bedroom ceiling to keep the room warm in a similar manner as outlined here.)
Plumbing
We installed a large shower enclosure, basin, electric radiator and toilet, and the sizes of these items was carefully considered when we were planning / building the studwork to ensure that everything fit correctly and that doors did not clash etc.
For this reason, we chose a sliding door for the shower.
Electrics
We installed new lighting to suit the space and also amended the existing ceiling fan.
An electric towel radiator was installed, and all work was carried out by an accredited electrician to comply with all current regulations.
Flooring
We also fitted a vinyl floor at this time, as you can see from the view into the en suite from the primary bedroom:
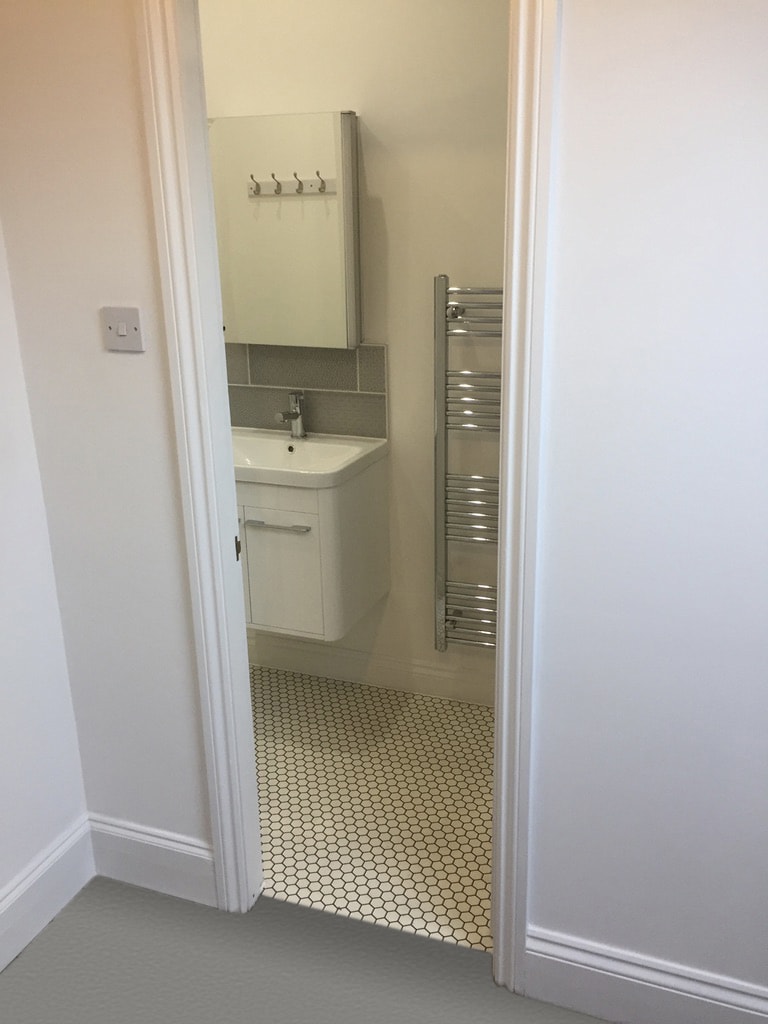
Vinyl is great as it is waterproof, easily cleanable and very affordable.
It’s also available in many designs including this geometric pattern that we also used on the upstand of the shower tray.
Wall tiling
We then tiled the shower area and behind the basin.
Here’s a close up of the storage nook when tiled:
Painting & Decorating
We painted & decorated where required.
In this case all the walls & ceilings, and also the woodwork i.e. doors, door-frames, skirting boards, architrave etc.
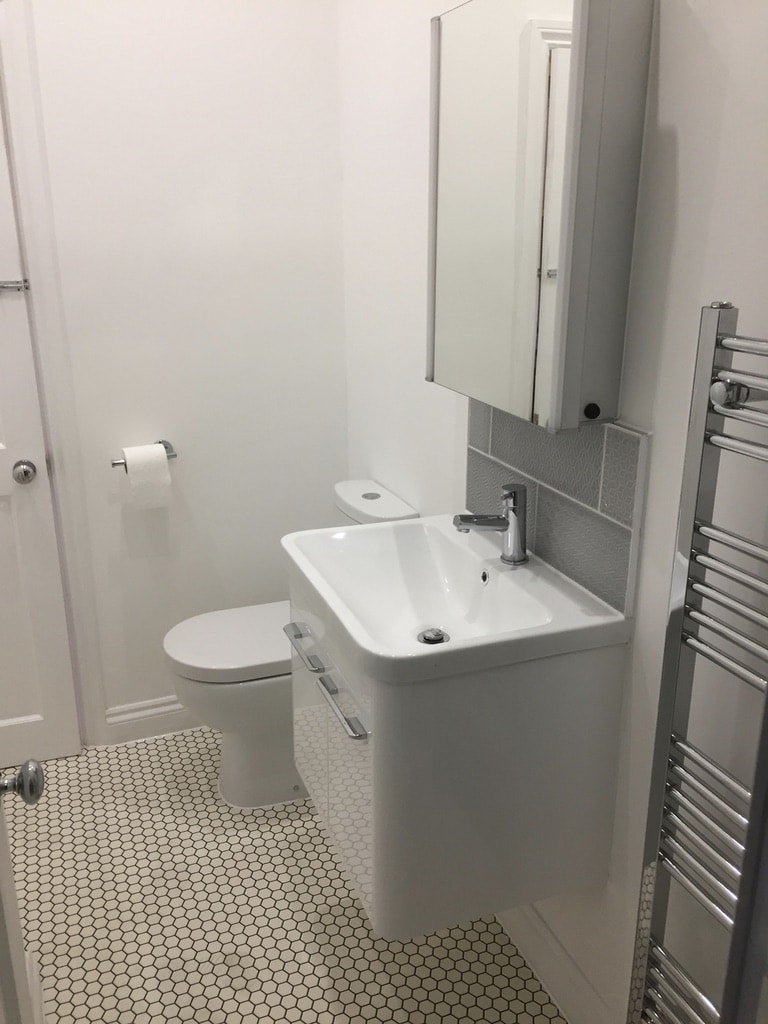
This is the view from the primary bedroom:

Summary
Project managed jack ‘n’ jill en suite installation in Leeds from start to finish with all the bits in between taken care of:
- Planned installation from start to finish
- No having to find a builder, joiner, plumber, then a tiler, a separate electrician, oh and also a plasterer, painter, vinyl floor fitter…
- No having to manage & communicate with all these trades to bring your plan to fruition.
- House left neat & tidy on completion with full cleanup.
If you have any questions or thoughts about this article or any others, please feel free to contact me or leave a comment.
Thanks for reading
Chris